How to use Soundburst Files and Folders in Spotify
What you’ll need: To do this task, you’ll need the Spotify Desktop app installed on a computer and a valid Spotify account. You don’t need the Premium plan. The free Desktop app will work.
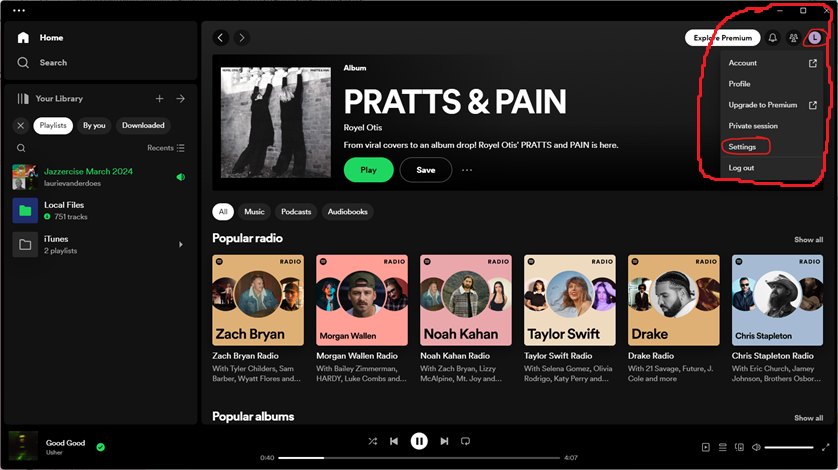
1. Open Spotify settings – Open the Spotify app and click your profile icon. From the pop-up menu, click Settings.
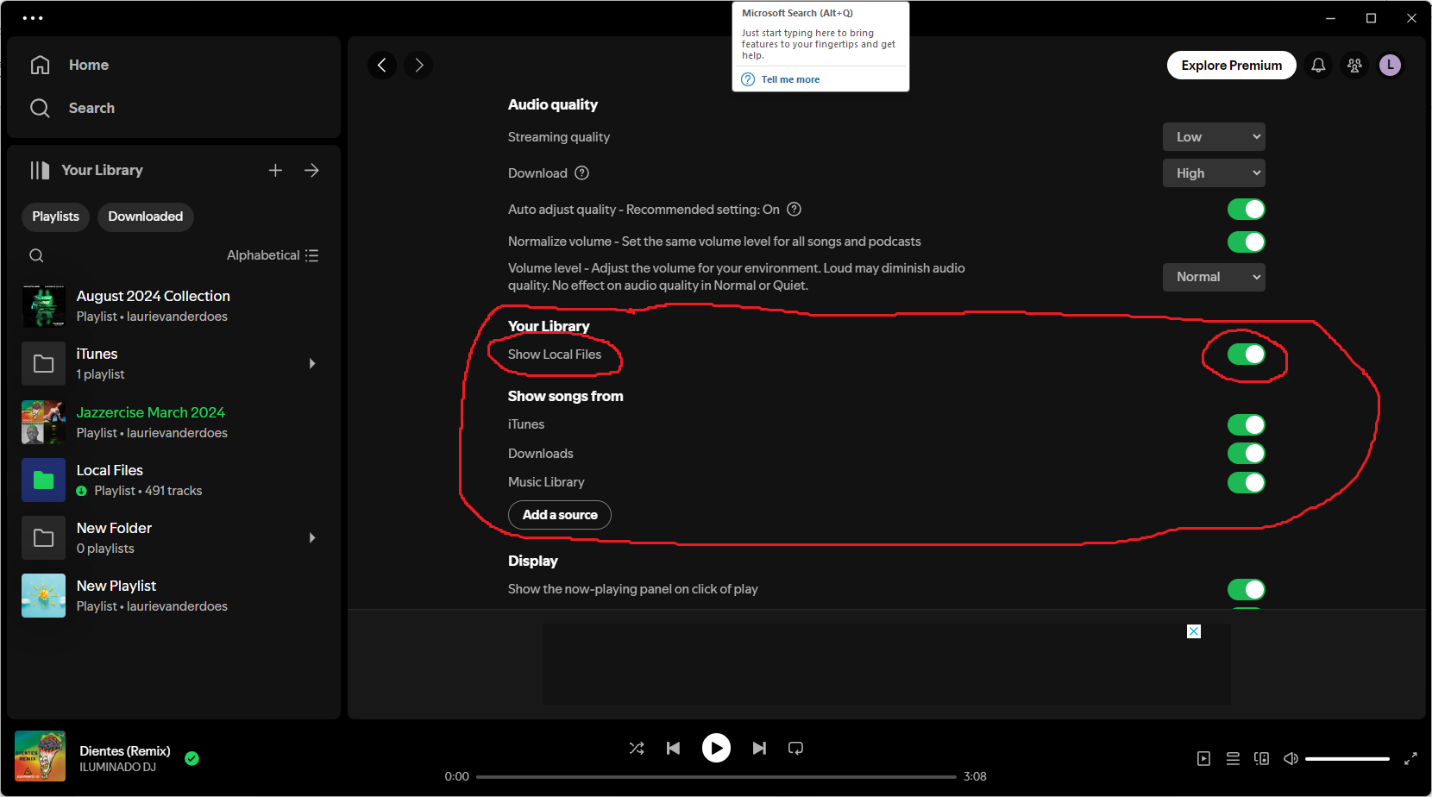
2. Enable local files – Scroll down until you see Show Local Files. Click the On/Off slider for that feature until it’s in the On position.
3. Add a source – After enabling local files, you’ll see a button labeled Add a source. Click that button and then, when your file manager opens, navigate to the folder that uses the music files you want to add. Select the folder and click OK (or Open, depending on your OS), which will begin the process of adding your files.
4. Access your local files – After adding the music, you’ll find a new entry under Your Library, called Local Files. Click that entry to reveal all the music you’ve just added.

5. Find the song titles you want. They are listed alphabetically. You can right click on a song to create or add it to a playlist.
6. You should be able to play the music on any device connected to this Spotify account.